Items ordered in the Sales Order are added in the Lines tab.
If the Sales Order was converted from an existing quote, the Lines tab displays all the items that were quoted on, and you may revise if required.
Note:
Mandatory fields are represented by an *.
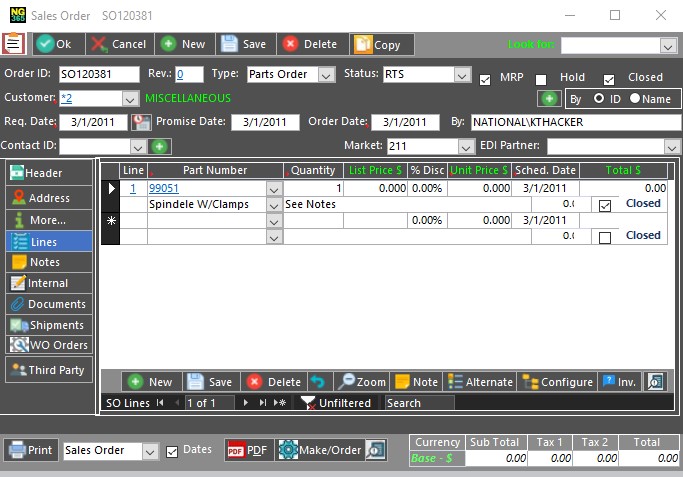
From the Sales Order form, select the Lines Navigation Button, the TAB shows as follows:
Sales Order Line Entry Tab
Click the  button to display the Sales Order form, which is used to add items and
their details by model. For further details on using this feature, see
Adding
Items To A Sales Order By Model.
button to display the Sales Order form, which is used to add items and
their details by model. For further details on using this feature, see
Adding
Items To A Sales Order By Model.
Or
Enter the fields as described below to add or edit a Sales Order:
Note:
Each line in a Sales Order comprises of 2 rows of
fields. E.g.,Place your cursor in the second row of the first line in the
Part Number Column and
notice that the field name changes as follows:  :
:

|
Field |
Description |
|
Line |
Enter the number of the Line within the Sales Order. E.g., enter 1, which represents Line 1 in the printed Sales Order. Or Proceed to select the Part Number, Qty, etc. and on clicking Save, the Line number is allocated automatically. |
|
Part Number |
Select the relevant part number from the drop-down list, which the Customer ordered. Add a substitute part if required. See step #4 for further details on adding substitute parts. |
|
Qty. (Quantity) Ordered |
Displays the number of parts ordered. Revise as required. Each time this field is revised, it affects the Sales Order Grand Total. |
|
List Price X Ref |
The List Price is automatically displayed, and if a cross reference has been defined for the part, it appears in the X Ref field. If multiple cross references exist for the part, one can be selected for the field using the drop-down box. This will automatically populate the Part # field. |
|
%Discount |
Enter the discount available on this Sales Order if applicable. |
|
Unit Price |
Enter the price per unit. |
|
Ext.Price (Extended Price) |
This field displays the total value of the parts in this Sales Order for the specified line. |
|
Closed |
If checked, indicates that all actions for the specified line are complete. |
|
|
To view the current requirements for a given part at any time. This tab includes all parts sold but not yet shipped, available inventory, purchase order information, along with quantity Ordered, Received and Returned parts from the Suppliers, date by which ordered parts are required and the date on which the parts are expected to be delivered are displayed. |
|
|
To view parts that can substitute for other parts throughout the system. |
|
|
To add a note to a specific line added to the Sales Order. |
|
|
To create Sales Orders based on an entire Model, and view all the parts within a required Model. A Model is an item that includes various components. E.g., a Radio-kit that includes 4 different parts. |
|
|
To provide a report on the part numbers purchased by the customer per sales order. The dates on which the Sales Orders were performed is recorded, as well as the details of each line. |
Note:
For details on the Currency, Local or Foreign, and Taxes included on the Sales Order, see The Sales Order Header Tab.
To add another item to the Sales Order, repeat step
#2. Each line added is reflected in the number of records
included on the specified Sales Order at the bottom of the form as
follows:  .
.
To add a substitute part, click  .
If there is no substitute part defined, the following message is
displayed:
.
If there is no substitute part defined, the following message is
displayed:
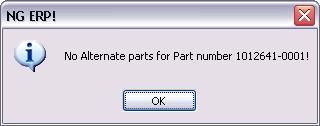
Click OK to close the message, and if required go to the Part Master to define substitute parts.
Or
If there are substitute parts defined, the following form is displayed:

Alternate Part Selection Form
The Select Alternate Parts form displays the Current Part # and specifies if the Sales Order was previously revised, by displaying a character in the Rev. field. In addition, it lists the part numbers that may be provided as a substitute to the Current Part #.
To select an Alternate
Part, click the  icon next to the part number that is an alternative to the current
part required.
icon next to the part number that is an alternative to the current
part required.
Click New to add a new line to the Sales Order and repeat step #2..
Click Save to save the line in the Sales Order.
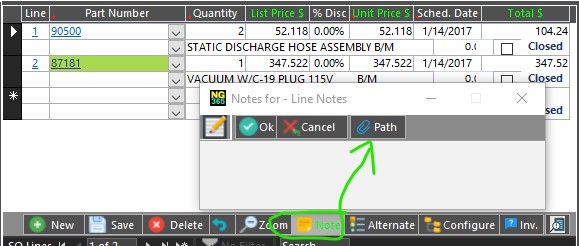
To view a note recorded on a specific line, select
the line, then click  . The Sales Order Line Notes form is displayed:
Click Undo to clear the line data recorded.
Click Delete to delete the defined line from the Sales Order.


