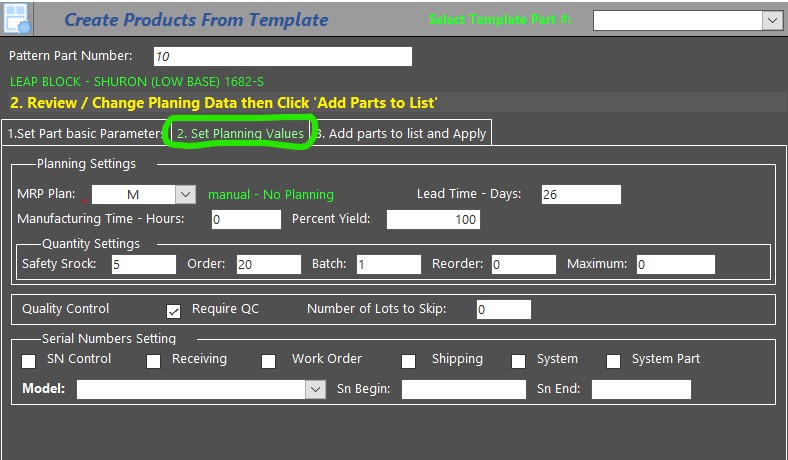
In the Pattern tab there are mandatory parameters, such as the stock room and location in which the item is stored.
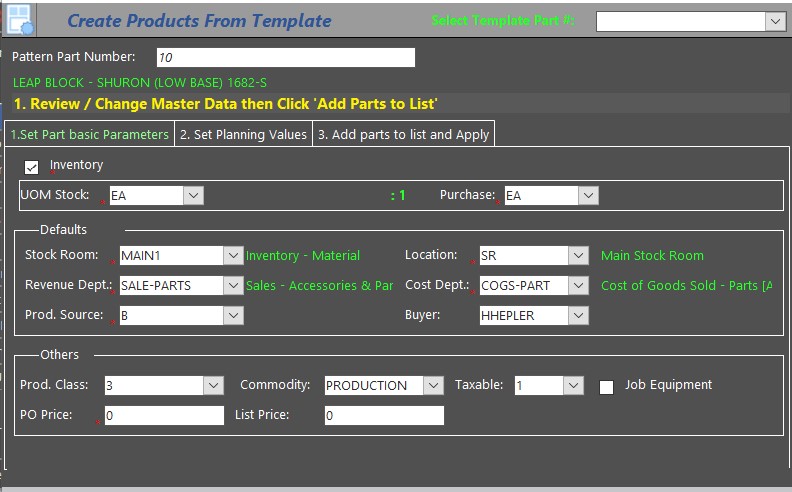
This tab includes fields to enter general attributes for the item. If you are using a predefined template, the mandatory fields are populated automatically. Modify if required.
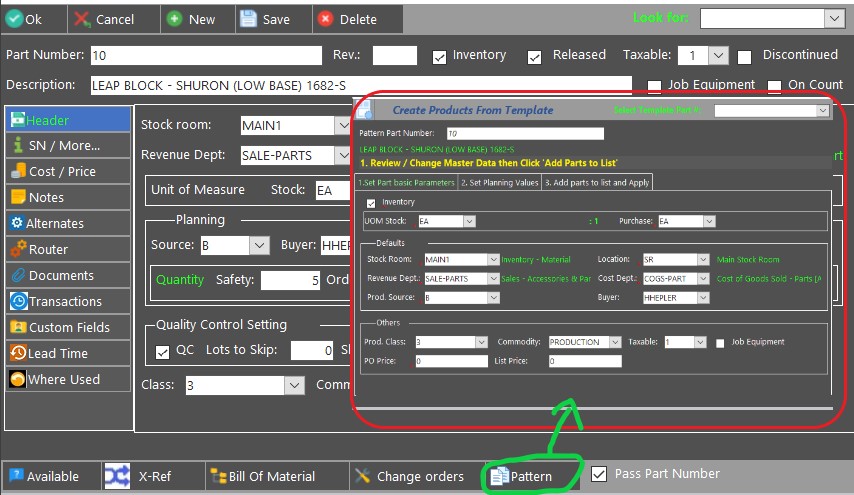
From the Part Master form, select the Pattern Navigation Button. The highlighted form is displayed as follows:
Part Master Template
The Part Template form has the following sections:
Basic Part Parameters - Automatically populated from the model Part Number and can be modified.
Part Planning Values - Automatically populated from the model Part Number and can be modified.
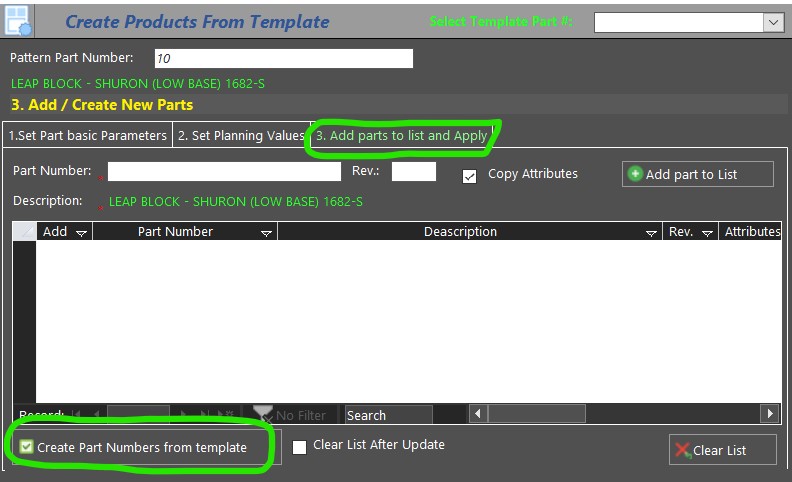
Add Parts to List / Apply - Section where you define the Parts to create and their description as well as add them to the Part Master.
Enter the fields as follows:
|
Field |
Description |
|
Use Template |
Select to set defined field properties in the template as the defaults on the Part Master form for each new item created. Create a template for a group of items that share various planning attributes, such as the Stockroom details, location, planner/Buyer, etc. After you apply a template to an item, the next item you create may use the template properties by default, inheriting the same attributes. In addition, if you use a template and then require modifying an attribute of the item, such as the Stockroom, all items associated with the template are updated with the new details. You have the option to clear the checkbox and not use the template, and then it will not be implemented when creating a new item. |
|
Description |
Enter a description for the item plan. |
|
Stockroom |
From the drop-down list, select the stock room in which the item will be kept. This is the default Stock Room for use when receiving incoming items. |
|
Location |
From the drop-down list, select the item's location. E.g., if the item requires quality control testing, select the QA Test location. The available values are limited to locations defined in the selected Stock Room. |
|
Sales Department |
From the drop-down list, select the default sales department to use when issuing or returning the part to a stockroom. This default value can be changed when actually issuing or moving the part. |
|
Cost Department |
From the drop-down list, select the department to use when issuing or returning the part to a stockroom. This default value can be changed when actually issuing or moving the part. |
|
Planner/Buyer |
From the drop-down list, select the name of the person who is planning the creating of the item, or the buyer for MRP use. This helps when executing MRP recommended purchases by filtering those recommendations to be executed by a specific Buyer. |
|
Revenue Department |
From the drop-down list, select the department in which revenue is collected. |
|
Source |
From the drop-down list, select the origin of this item, e.g., if the item is being created in house, select In House Manufacturing, or if the item comes from a third party and you are just keeping it in your item stocks, select Subcontractor Item. Each option is coded by a letter. The Source is predefined in either the Administrator/Company/Part Cost Method, or Finance/Cost/Part Cost Method modules. Available values typically include values such as “Make”, “Buy”, and “Bulk”. |
|
MRP Plan |
From the drop-down list, select the MRP plan used to define how the item is treated within the manufacturing planning routines: There are 3 options: |
|
UOM Stock |
From the drop-down list, select the Unit of Measure to be used for the item. Available values are defined in the UOM setup table and typically include values like “Each”, “Box”, and “Dozen”. |
|
Purchase |
From the drop-down list, select the Unit of Measure to be used when purchasing the item. Available values are defined in the UOM setup table and typically include values such as “Each”, “Box”, and “Dozen”. An example might be buying items by the Box and issuing individually (Each). |
Click Apply to create the new Parts in the list.
Click ![]() to set
defaults on product master form.
to set
defaults on product master form.
Click ![]() to copy
current part settings to use as your pattern.
to copy
current part settings to use as your pattern.